

Description
This blog post series is a walkthrough of how I created an Active Directory home lab Environment using VMWare. I set up a Microsoft Server to run Active Directory on it. I then configure a Domain Controller that will allow me to run a domain. After that, I ran a PowerShell script to configure our vulnerable Active Directory, This lab simulates a business environment. In this lab, I’ll need a Microsoft Server 2019 ISO, A Windows 10 Enterprise ISO, VMWare and Kali Linux to serve as an attacker machine.
Environments Used
- VMware Pro
- Microsoft Server 2019
- Windows 10 (21H2)
- Kali Linux 2023
Links
- VMWare: Link Workstation-Pro
- Microsoft Server 2019: Link Here
- Windows 10 ISO: Link Here
- Kali linux : Link Here
Network Diagram
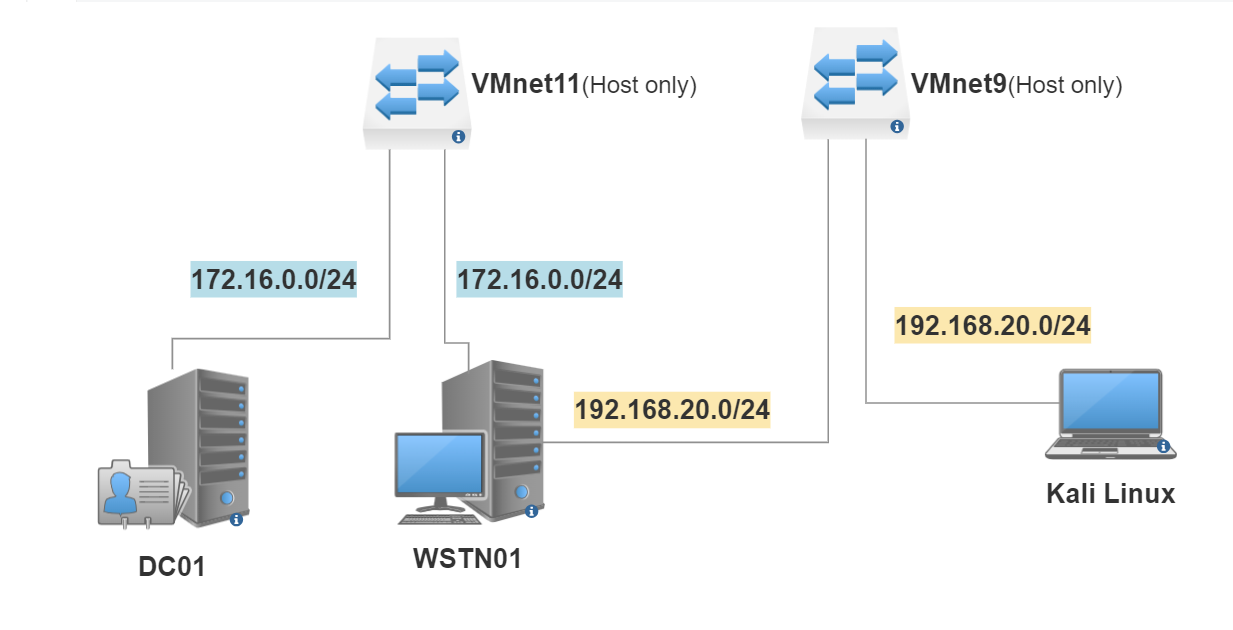 Our Network Lab
I’ll assume you have VMWare or VirtualBox running and prior knowledge of setting up VM’s, but I’ll still go over the basics. Click to create a new virtual machine and select your Windows Server 2019 iso that was previously downloaded. This will be our domain controller!
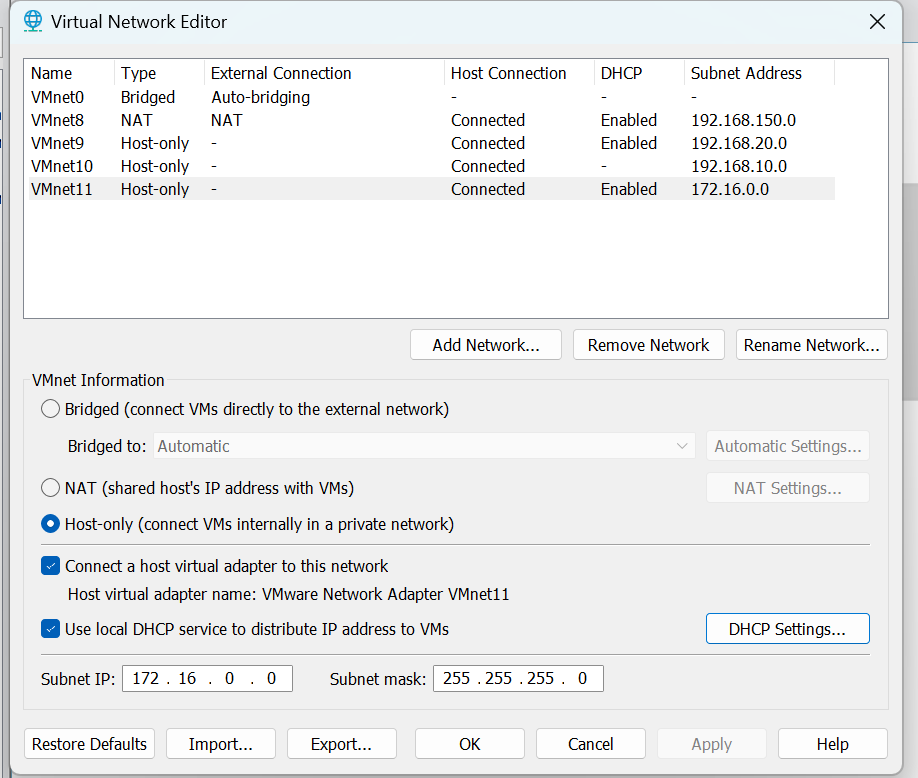
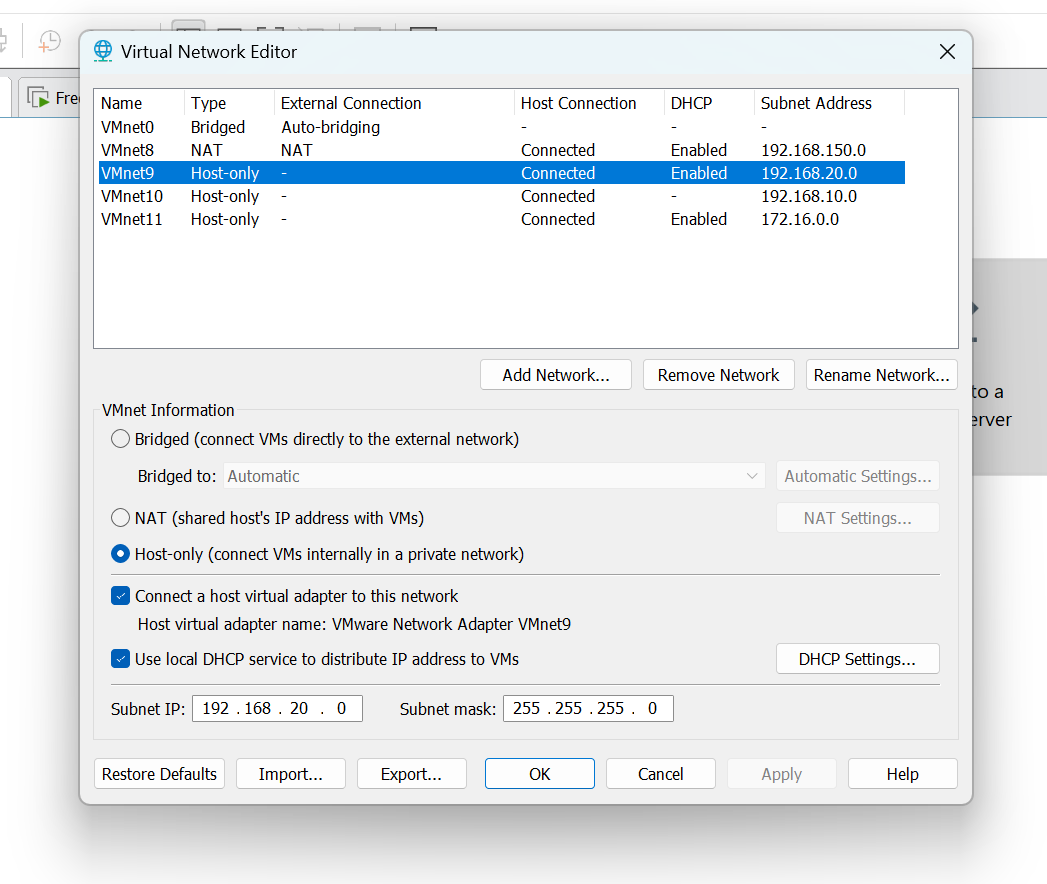
Configure VMware Netwok Adapters
Go to Edit > Virtual Network Editor than click Change Settings
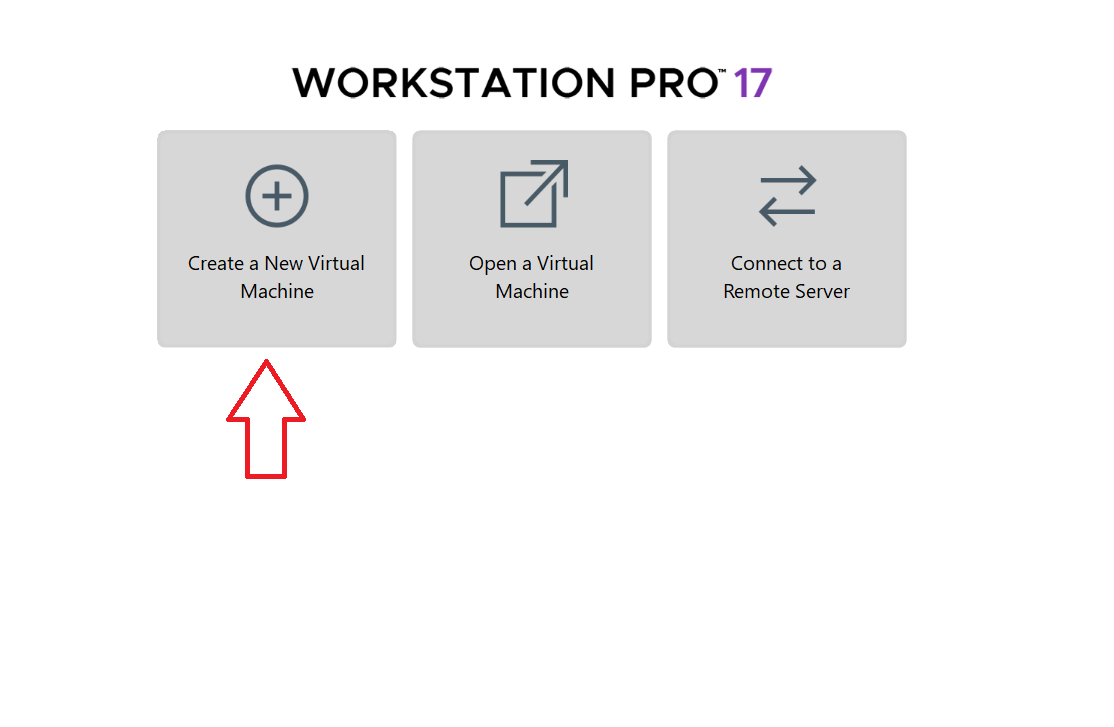
Create Our Virtual Machine
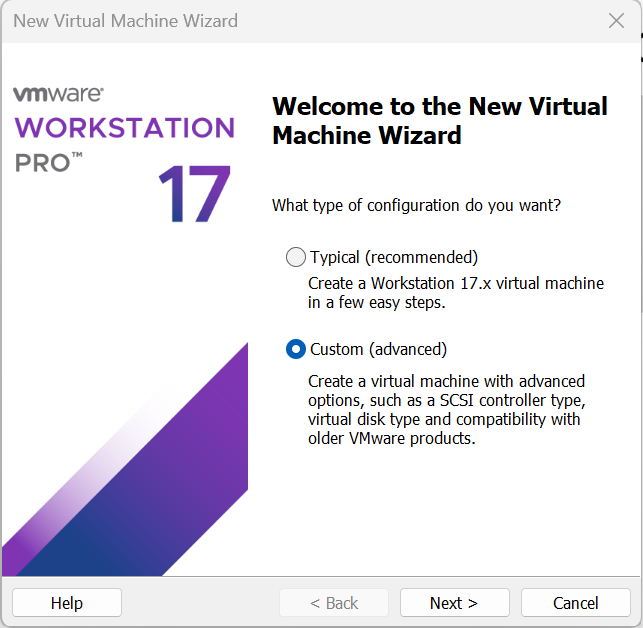
Click on Create a new virtual machine, Then, choose the Costume (Advanced) option than click Next.
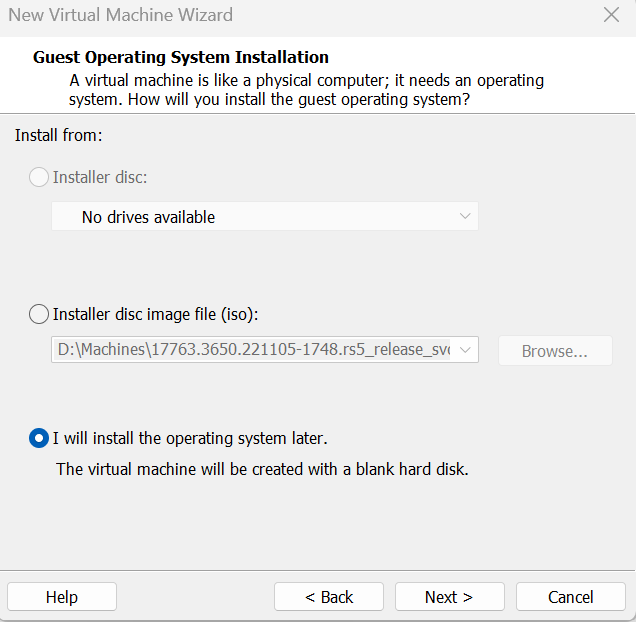
We choose to ignore selecting the server image file iso to save our time from skipping some steps.
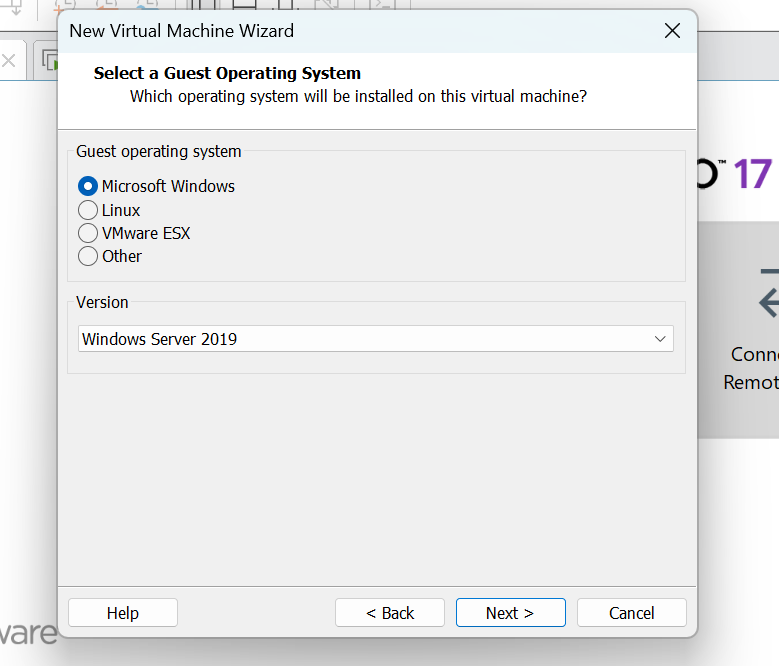
Here we choose our Guest Operating system as windows Server 2019.
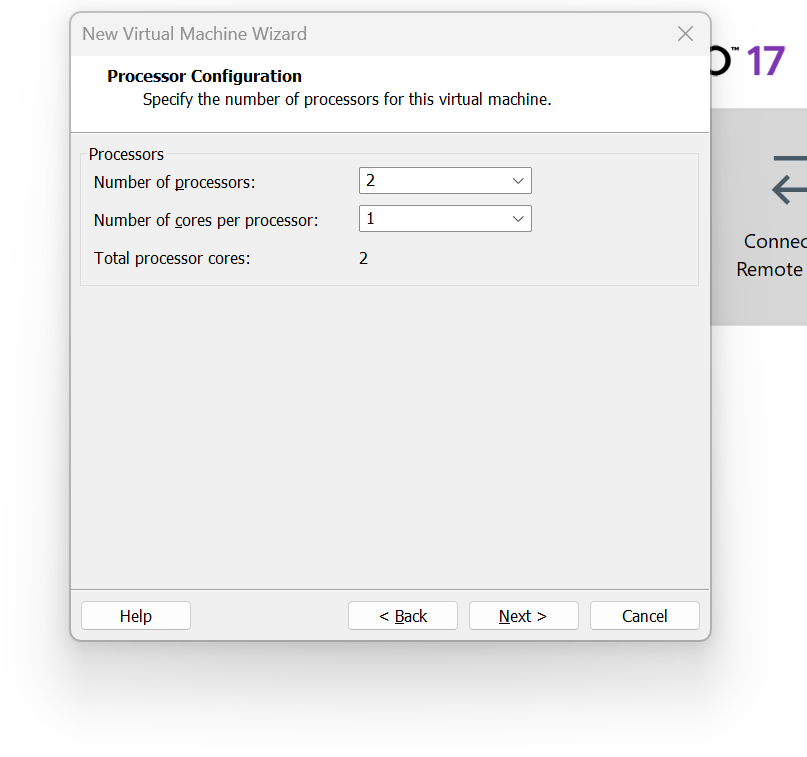
Next, we customize the VM “Hardware Specifications”. Since we are setting up a server with a heavier workload than a regular workstation, we will allocate two (2) virtual processors to ensure the server performs at a reasonable speed.
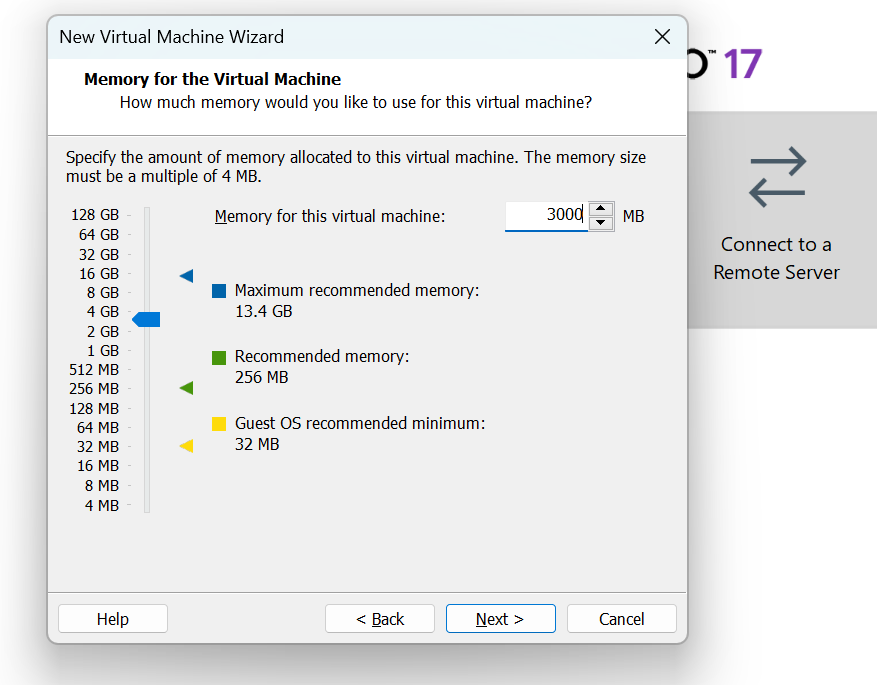
Here we specify the amount of memory for our Domain controller machine , I think 3Gb is good to go.
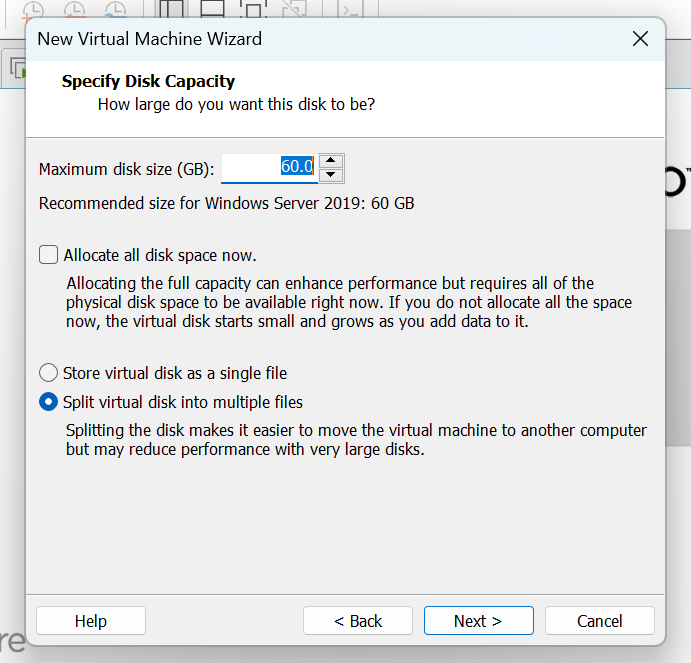
For our disk size 60Gb is by default , if you don’t have that much space you can minimize it to 40Gb.
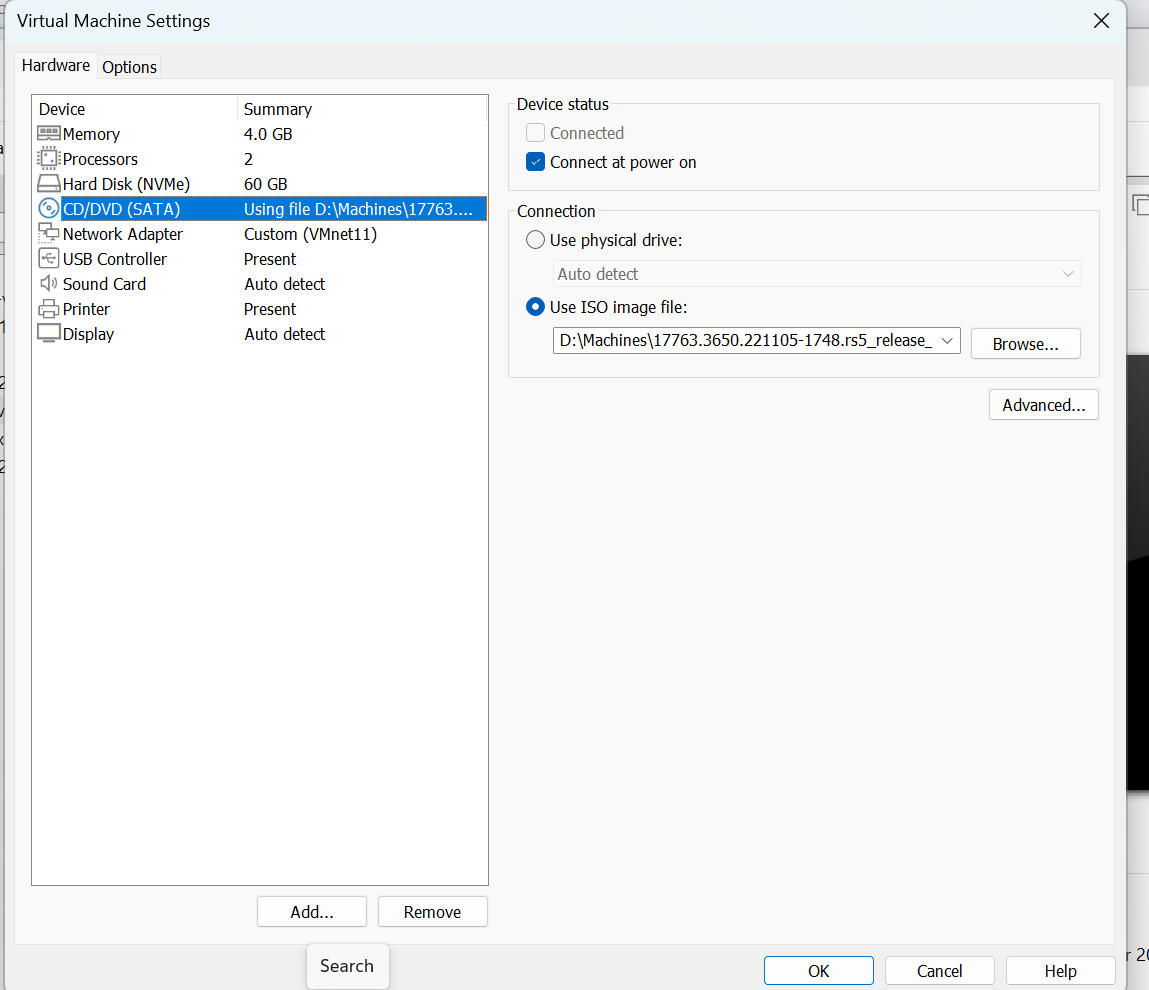
Before launching our machine go to Edit Virtual machine Settings than select windows server 2019 iso file from you local host.
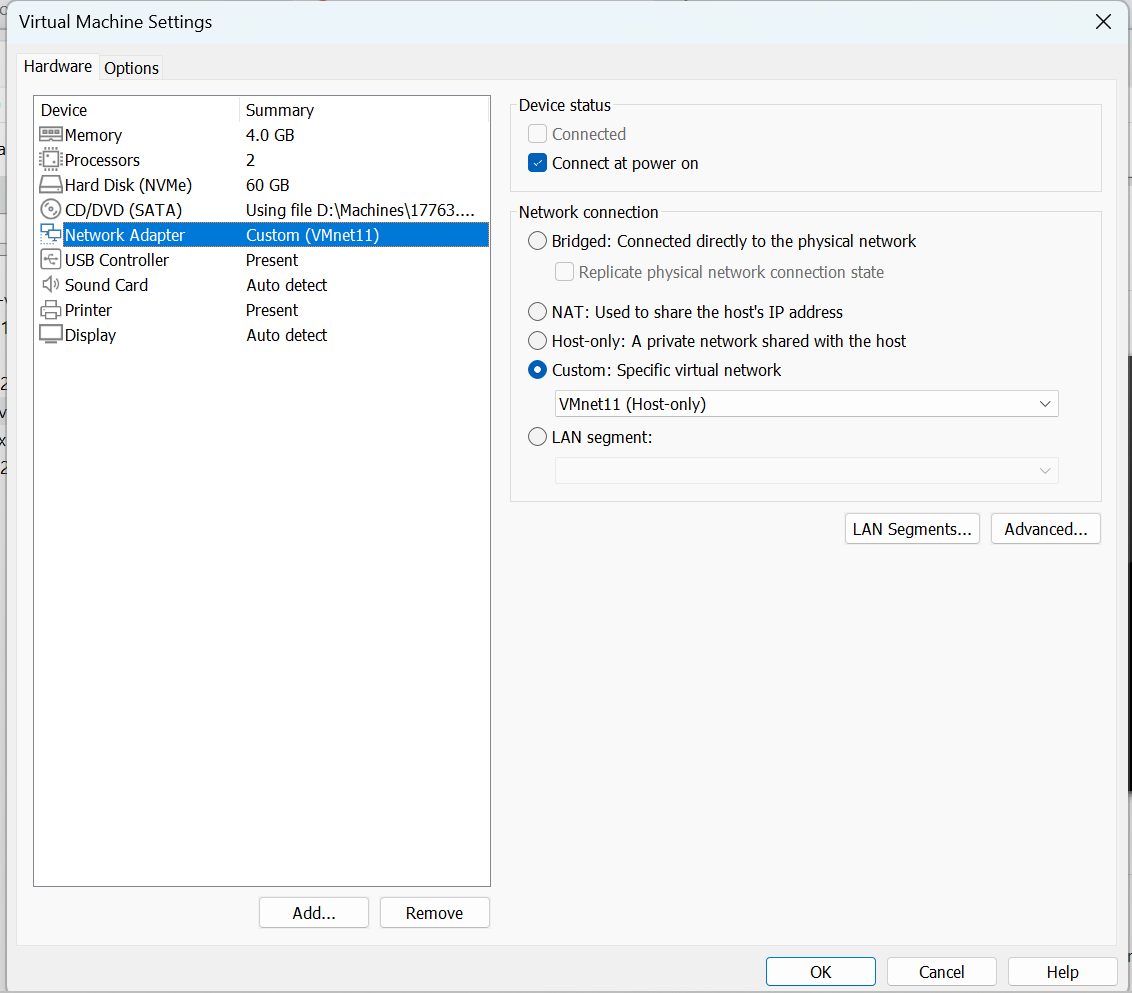
Another thing we change our network adapter to VMnet11
Install Windows Server 2019
Clicking “Next” after starting our windows server machine will bring up the Operating System Wizard. To begin the installation process, click “Install Now.” The following step will present four install choices, with two being labeled as “Desktop Experience” for a complete graphical experience. Choosing the second option, “Standard Evaluation (Desktop Experience),” is what we will do.
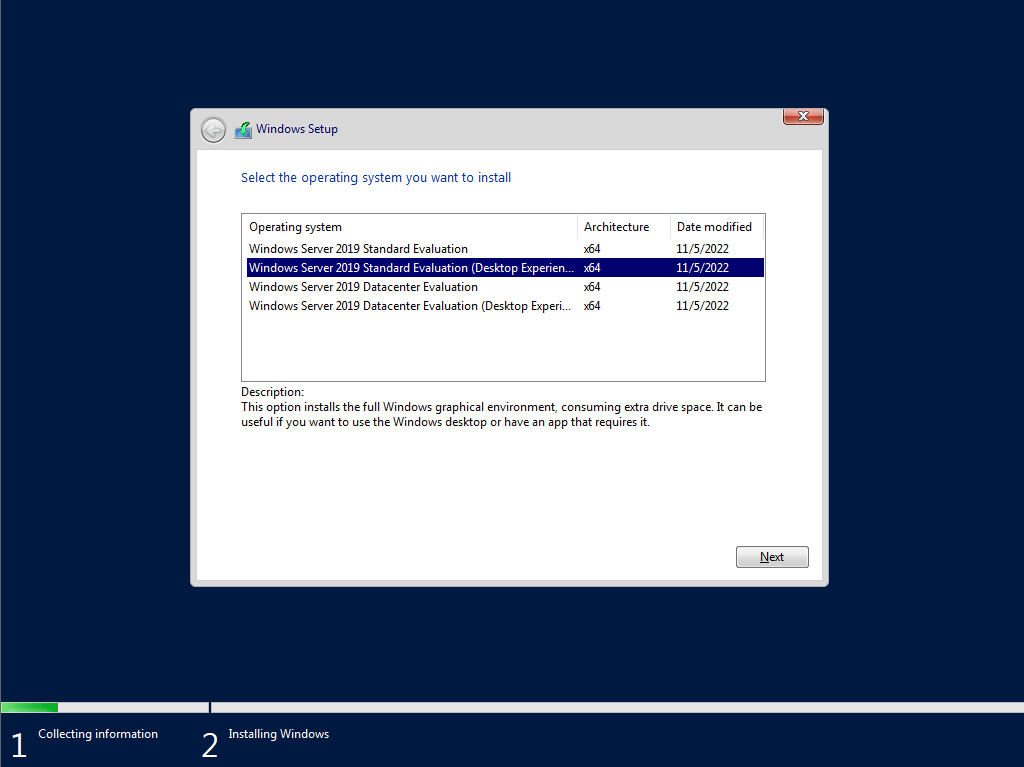
The Standard edition is designed for small-to-medium-sized organizations that need no more than two instances of the server software in a virtual operating system.
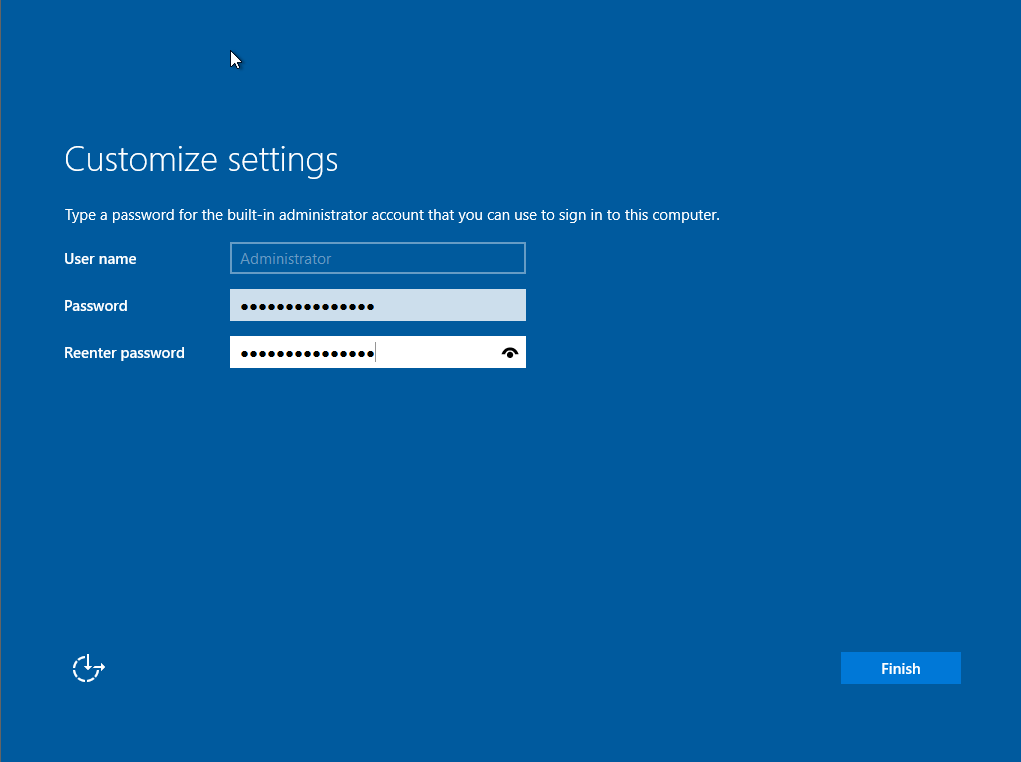
The next steps are the same when you installing a windows os in virtual machine, When it is done, you will be presented with the “Customized Settings” screen to set up the local built-in Administrator password.
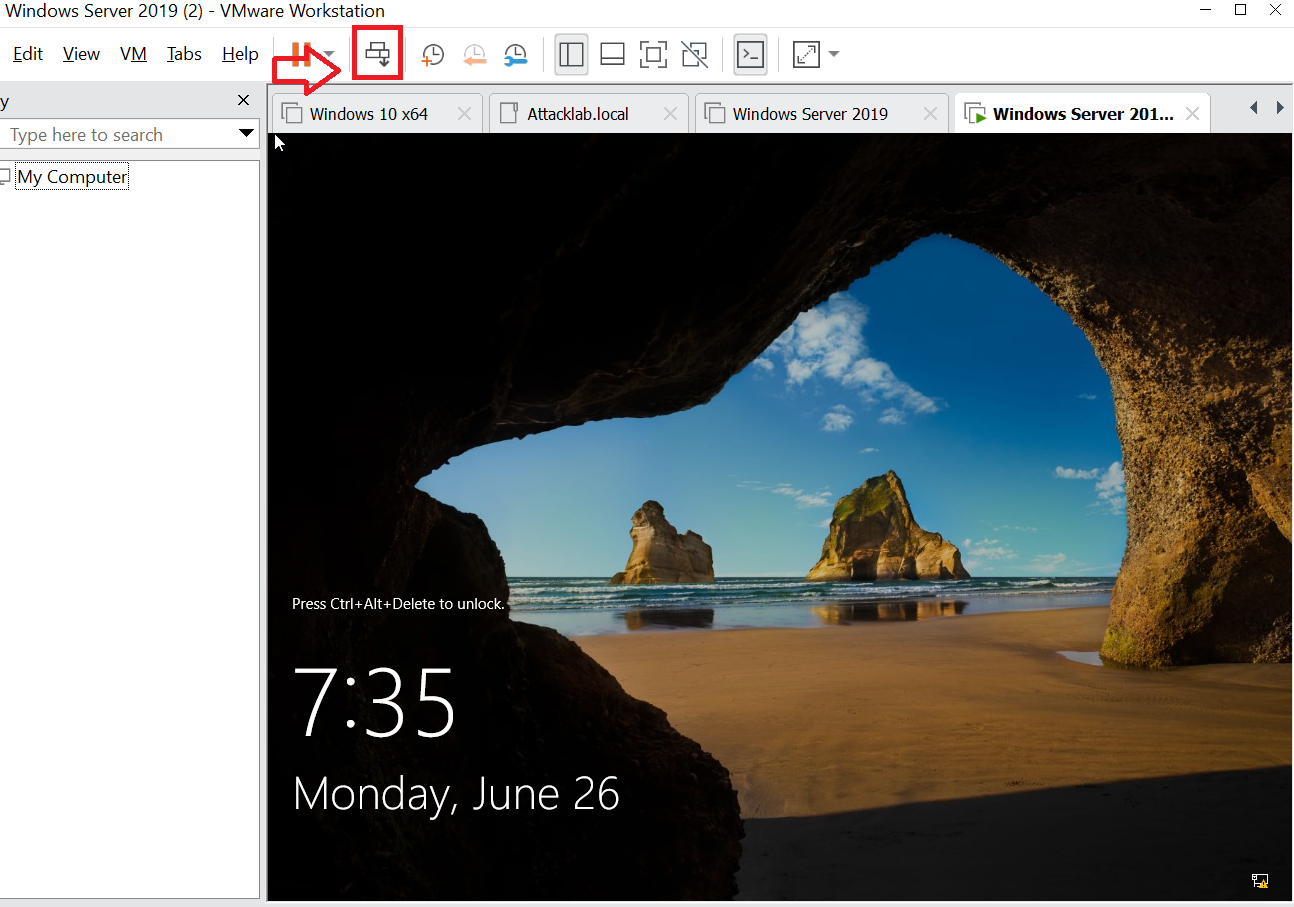
Click on the button in red square to unlock.
Configure Windows Server Network
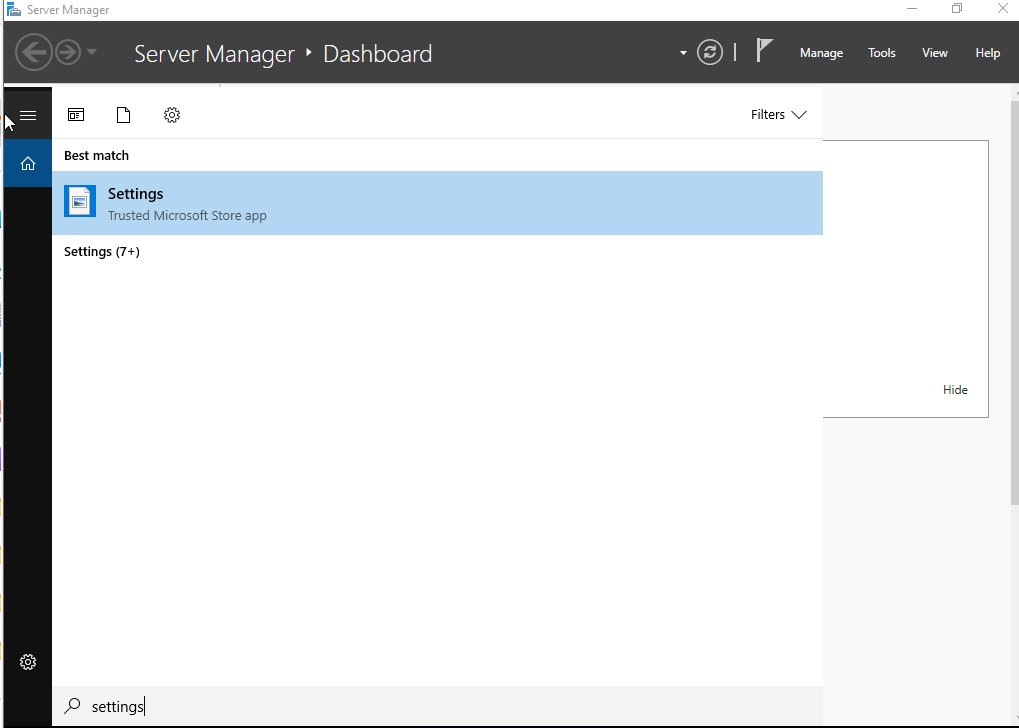
After logging into the server, we will start configuring a few things before installing Active Directory Services. In search bar search for Settings than click Network & Internet.
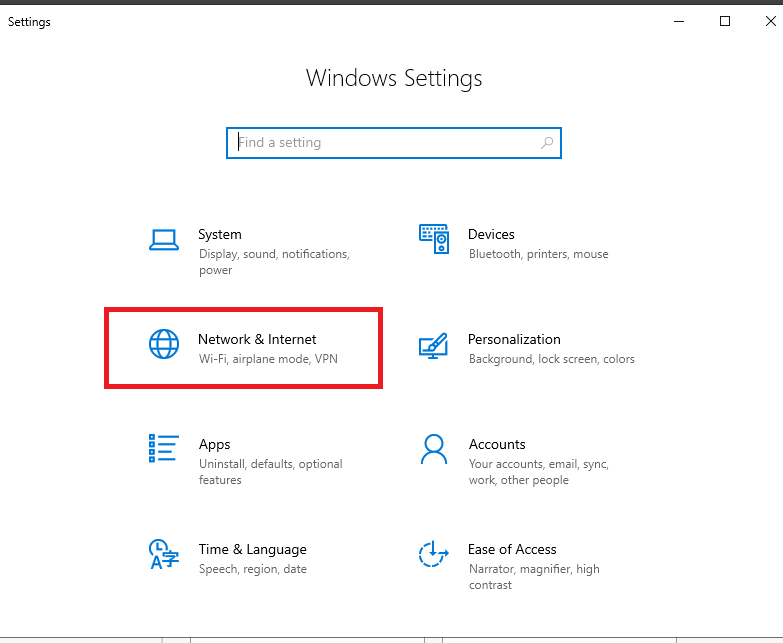
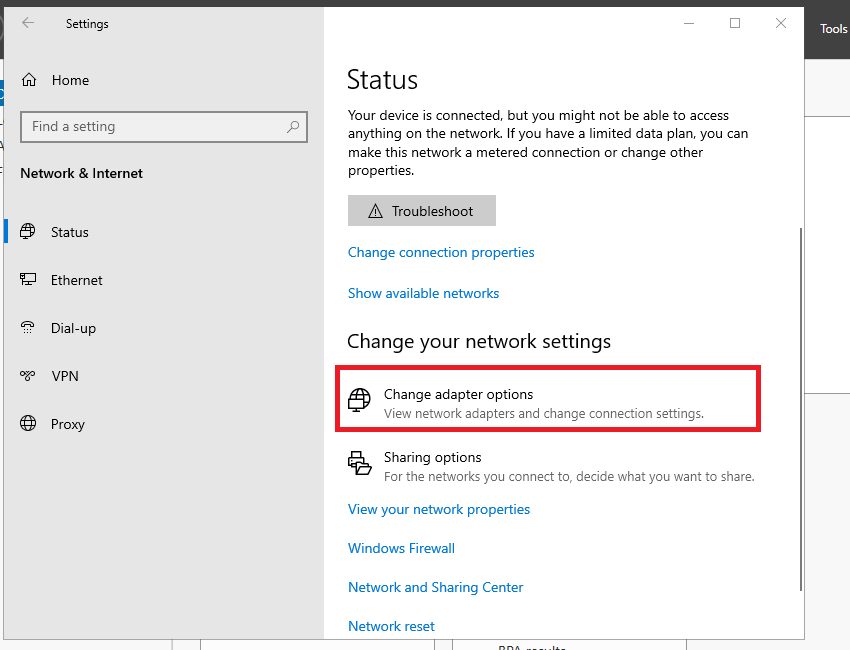
Click Change adapter options.
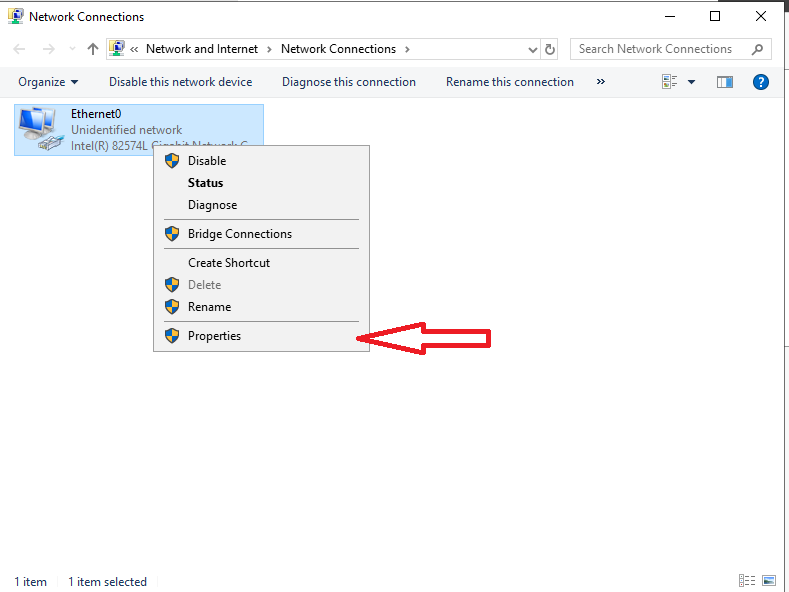
Go to Ethernet0 > Properties.
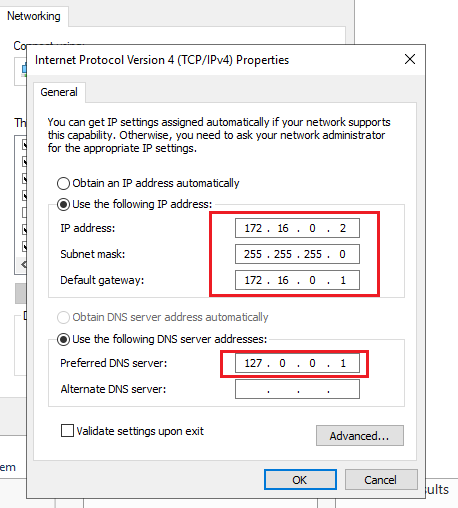
check Internet Protocol Version 4(TCP/IPv4 than click on Properties.
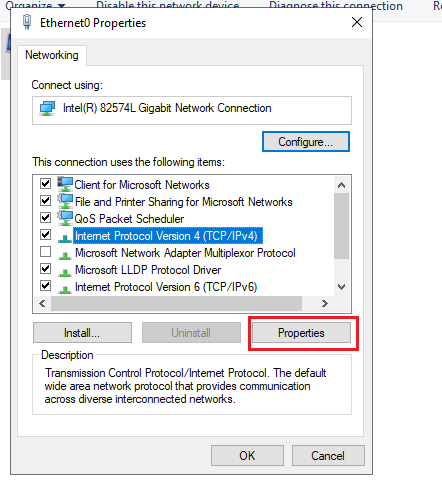
since we dont need internet for our lab, I decided to have the Host only network in the 172.16.0.0/24 range. Therefore, I assigned the server an IP address of 172.16.0.2 and a subnet mask address of “255.255.255.0”. Also for the DNS, we assign it the DC address, which is a loopback of 127.0.0.1 so it pings itself.
Change Windows Server Name & Time Zone
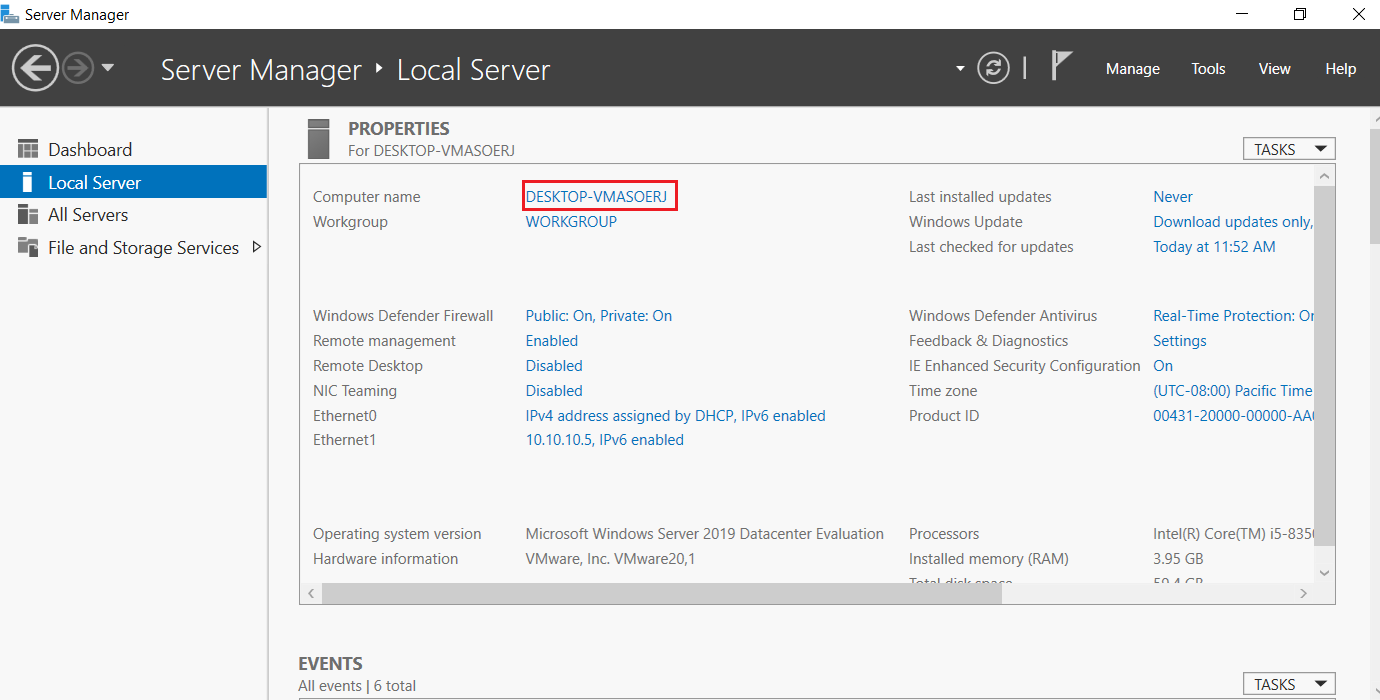
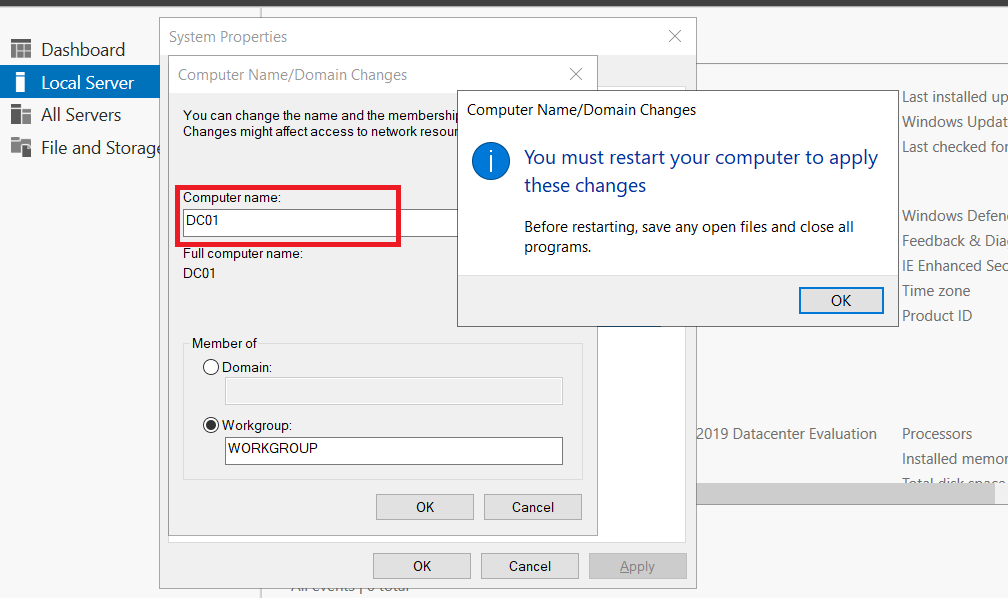
Now we need to change our computer name to DC01 , to do that click on Computer name in Server Manager.
After changing our computer name a windows pop-up shows up asking to restart our machine , click ok.
Changing the “Time Zone” to its location is an optional step. While it is not necessary to change the Time Zone, but it is important to ensure that the server Time and Date are configured. This is especially important because the server will be promoted as a domain controller. Having the server time and workstations in sync is essential for the proper functioning of the Kerberos protocol, which issues tickets for authentication.

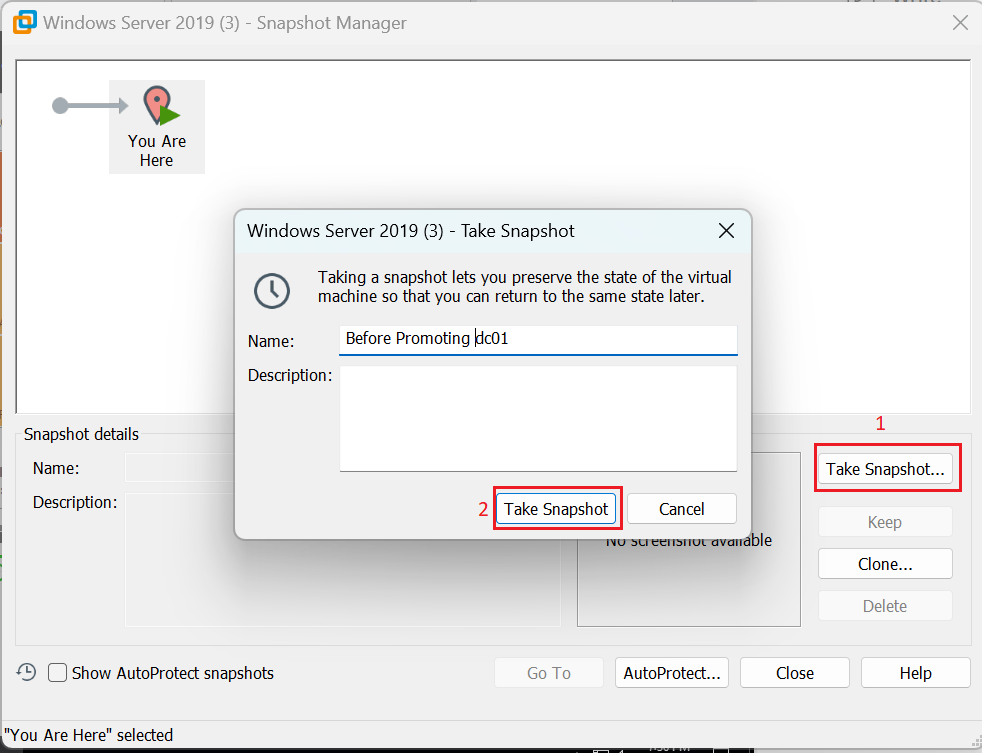
Take Snapshot
Before configuring Active Directory, it is very important to have a Snapshot of the current state of the VM. This caution allow us instantly reverte our machine to initial state of the VM if any step goes wrong during the process. Snapshots allow you to easily restore to a previous state and then resume your development, allowing you to troubleshoot and recover.
Go to VM > Snapshot > Snapshot Manager.
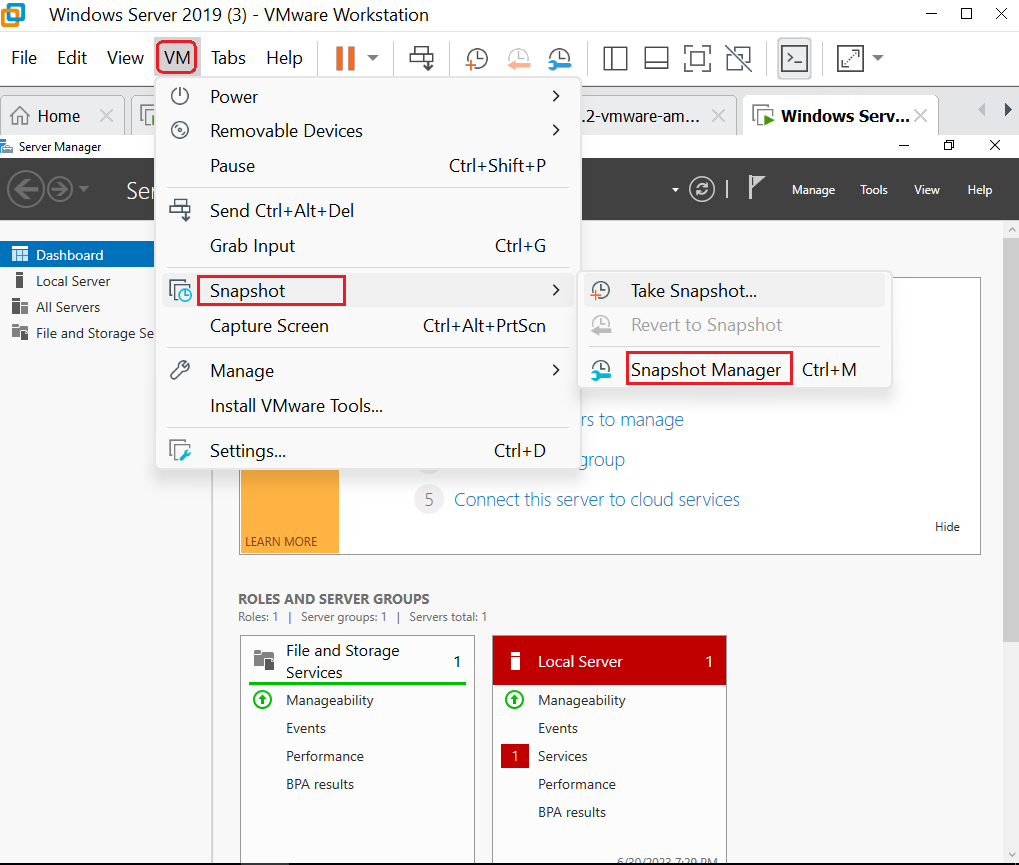
Click on Take Snapshot and write something related to the state of machine.
That’s all for this post. In the next post, we will work on installing the Active Directory services and configuring our vulnerable Active Directory lab.